Intro
In this write-up I share how I personally generate subtitles for videos that involve screen capture on my MacBook. Specifically I will show you my example integration with the video streaming service Mux (via Contentful) but this workflow is easily adaptable and applicable for any service that accepts the WebVTT format for subtitles. We’ve also a bonus how-to at the end for embedding subtitles directly into a .mp4 file using Subler!
One more thing before we get started…
The workflow I go over in this article includes several open source solutions as well as some paid services… and to be fully transparent the completely somewhat unbiased solution I landed on for generating subtitles uses a paid application for macOS which I created called VideoSubs.
OK! With that out of the way; If you’re still with me– now we can get started!
My Workflow
I have a video workflow that begins with the open source streaming software: OBS. OBS allows me to record my Mac’s screen + my face + talking all at the same time (tutorial videos etc). Once recording is complete OBS outputs my recording into a .mkv file which I then upload to my headless CMS Contentful who then forwards it over to my video streaming service Mux.
For those who don’t know, Mux is a video streaming service that eases the burden of managing video online and uses HLS streaming technology for playback. Mux also offers quite a few features for processing and working with video; one such feature is the ability to add subtitle tracks to your videos! When a subtitle track is added to your Mux video your subtitles can optionally be turned on in web players or they can be forced on.
Subtitles
No one was forcing me to add subtitles to my videos, but I personally feel that subtitles add an extra sense of professionalism to a video as well as shows a courtesy to viewers who are either hearing impaired… or simply can’t have the volume up currently. What you decide is up to you, but I suspect, since you are still reading this article on subtitles, that you feel the same way?
Anyhoo, once I decided that I wanted to add subtitles into my video workflow I had to decide on two things:
- How was I going to generate the actual on-screen text for every video’s subtitles
- How was I going to include those subtitles with my video stream since the Mux app for Contentful does not allow you to add tracks after being created!
Another requirement from Mux was that the subtitle track had to either be in the SRT, TTML or WebVTT formats. I had no idea what these formats were but after Mux’s informative article I got the gist and quickly started to take a liking to the WebVTT format for its simplicity e.g.
WEBVTT

00:01.000 --> 00:04.000
- Never drink liquid nitrogen.

00:05.000 --> 00:09.000
- It will perforate your stomach.
- You could die.
With this example we are telling the video player that we’d like to display the text “Never drink liquid nitrogen.” from 1 second into the video –> 4 seconds.
Options for Generating Subtitles
A couple of Google searches and I was able to find a few online services that generated subtitles for videos in standard formats, yahoo! Unfortunately, though, there were some general issues with all of the services I came across:
- They were a tad bit expensive. Not just up-front but ongoing subscription expenses or pricing per minute– I should mention that although I see the value in subtitles; a major goal I had with my video creation workflow was to keep my costs low!
- They involved their own video creation workflow, hosting and or other entire suite of features that I just had no interest in.
After searching online for a day or so to no avail… a thought came to me 💡 I had recently released an app for iOS that was able to generate subtitles on-the-fly for videos using Apple’s Speech framework and although the app would burn those subtitles into said video’s data directly… perhaps I could repurpose the code to generate a WebVTT file instead! Thus VideoSubs is born.
VideoSubs App
So, with the code repurposed from my other app for VideoSubs' use, I was able to proceed with generating my subtitles in 3 easy-peasy steps:
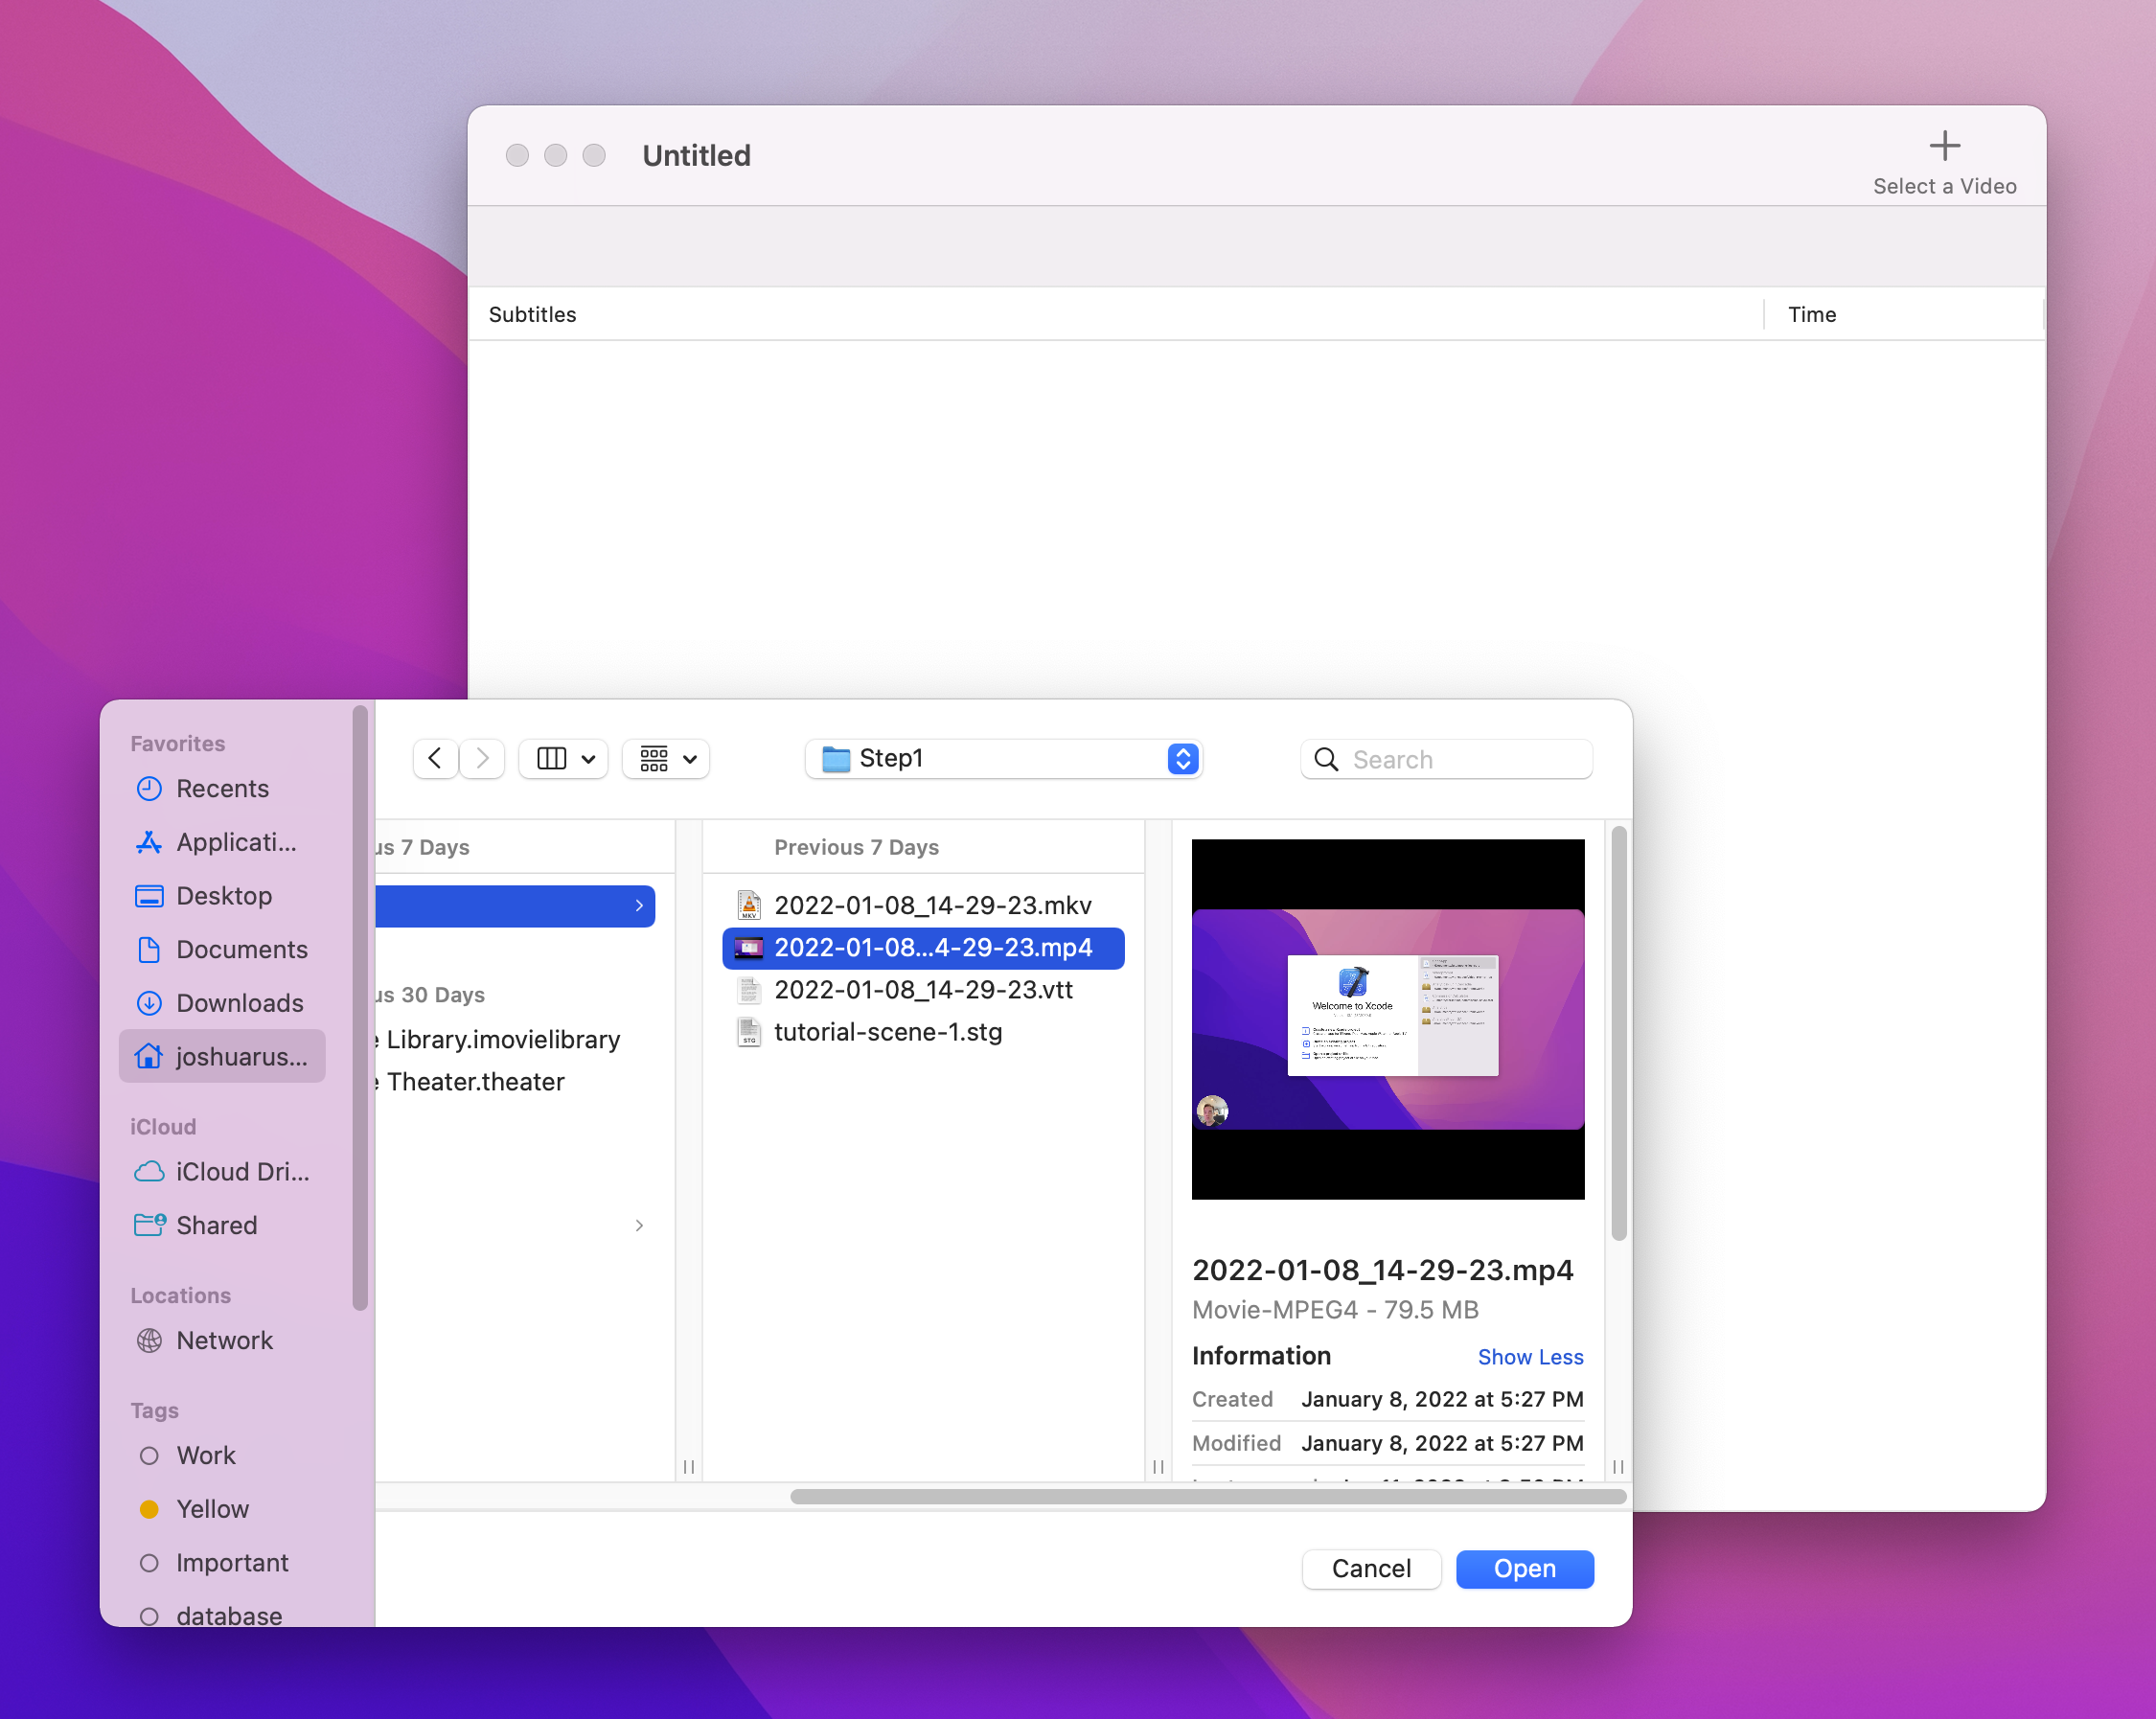
Open VideoSubs, click the ‘Select a Video’ button and select the video file that you would like to generate subtitles for. The video should be in an Apple-friendly format (.mp4 or a .mov) also, the video should have some speaking in it… otherwise nothing will be generated.
Wait for the subtitles to be generated. This can take some time depending on the length & size of your video– it took ~60 seconds for my video to generate which is just under 4 minutes long.
Go through the list of generated subtitles and make any necessary edits. This step can vary depending on how well you enunciate your words– for some reason I speak as if I am drunk when I record myself so there were some fixes I needed to make. Another reason to make edits would be for any grammar you’d like to add or punctuation.
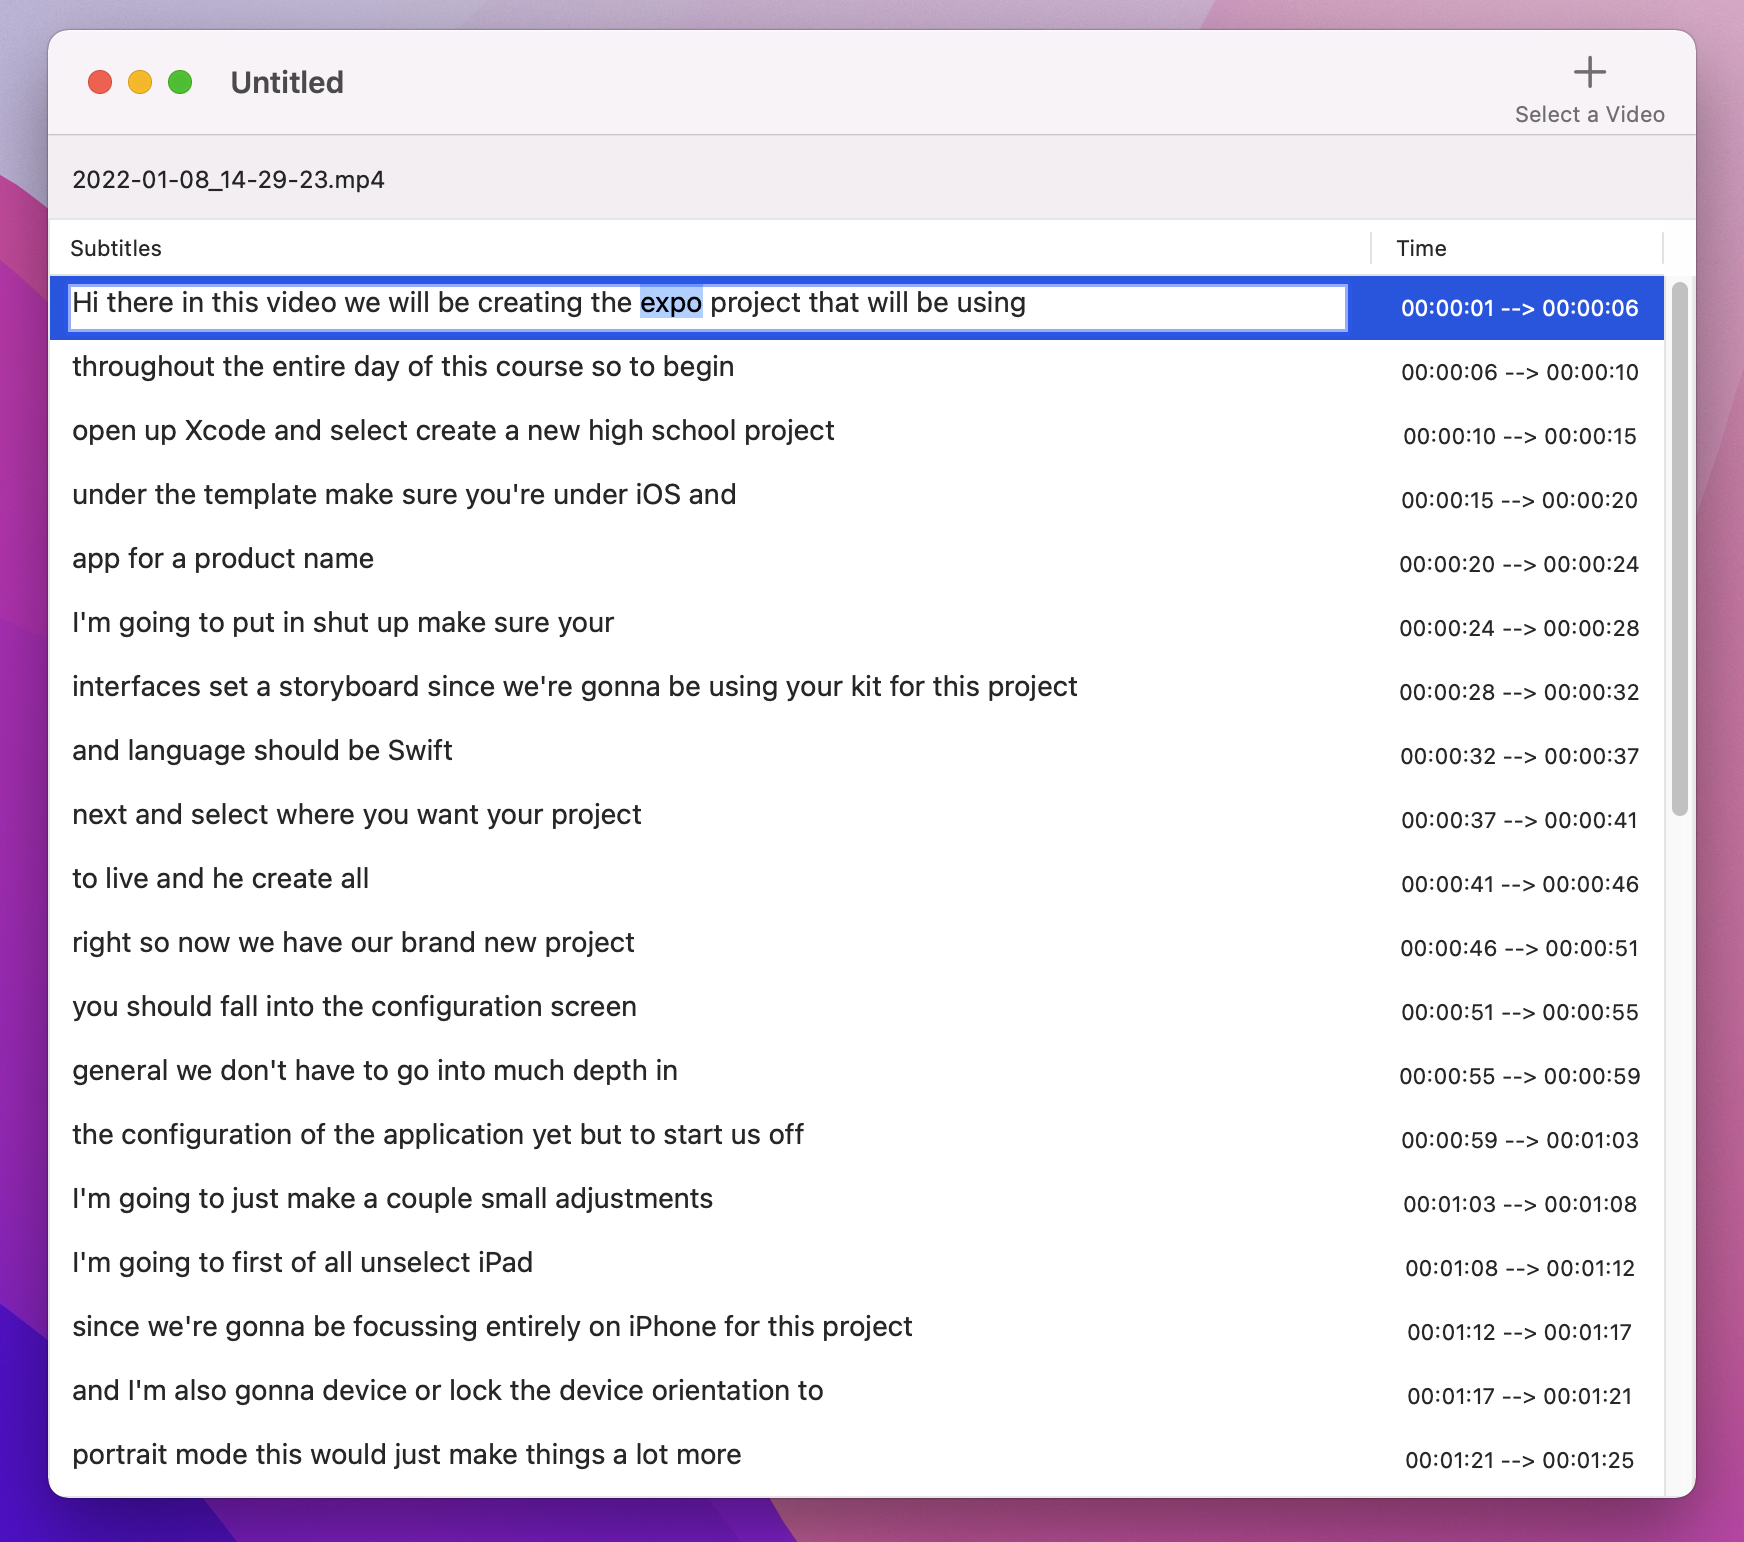
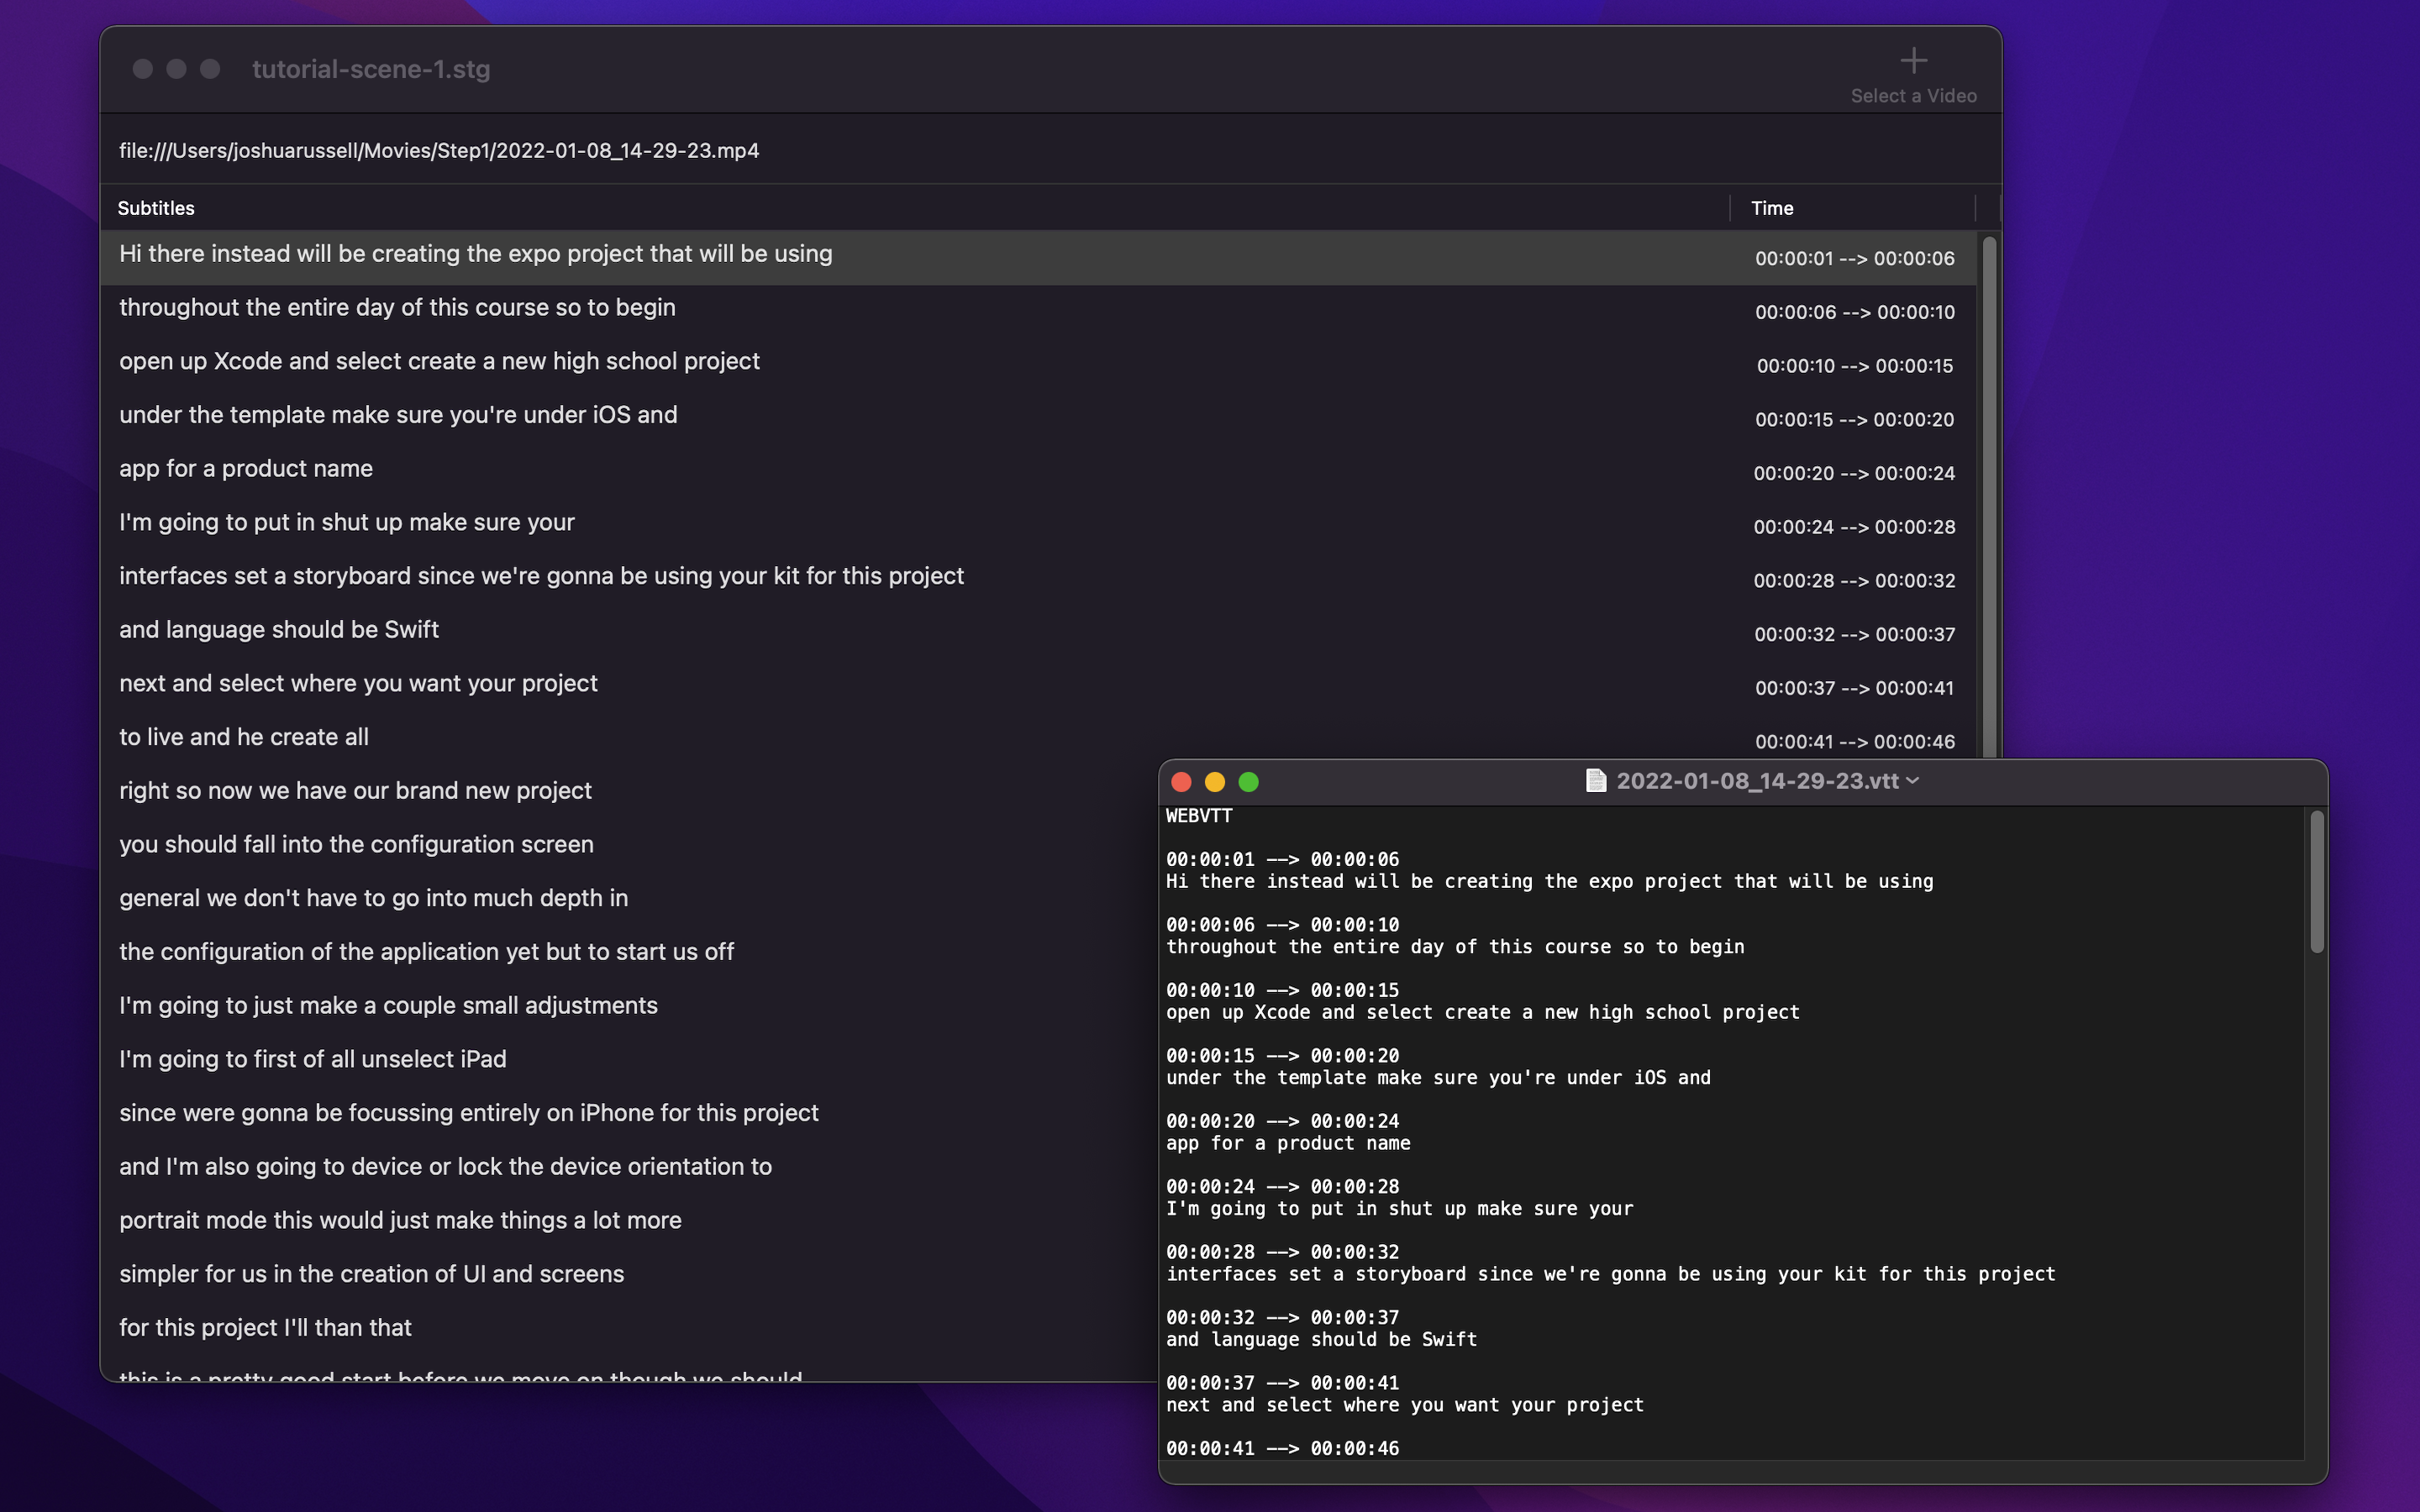
The list of subtitles VideoSubs generates puts the detected speech in the column titled “Subtitles” and the time stamps in the column titled “Time”. You can edit each speech cell directly in the list but you cannot edit the timing.
The final step is to export your WebVTT file by clicking on “Export WebVTT File” under the File menu.
Pro-tip you can save your VideoSub file to your Mac which allows you to not have to re-generate the subtitles for your video in the future
Uploading to Mux
If you don’t plan on using Mux you can skip this section and go to Subler section
Like I said previously, I upload my video file in Contentful with Mux’s Contentful app. The app creates a new video asset on Mux’s side of things and there’s currently no option to add tracks to an existing asset through Contentful’s UI– Mux does provide an API though where we can do just that! Create an asset track
The API requires you to have your WebVTT file publicly accessible I used my Cloudinary account (but it could be a S3 bucket etc.) I used Postman to make the request(s) but you can use any HTTP client you prefer (cURL, Insomnia etc.) just be sure to add your authentication credentials to your requests.
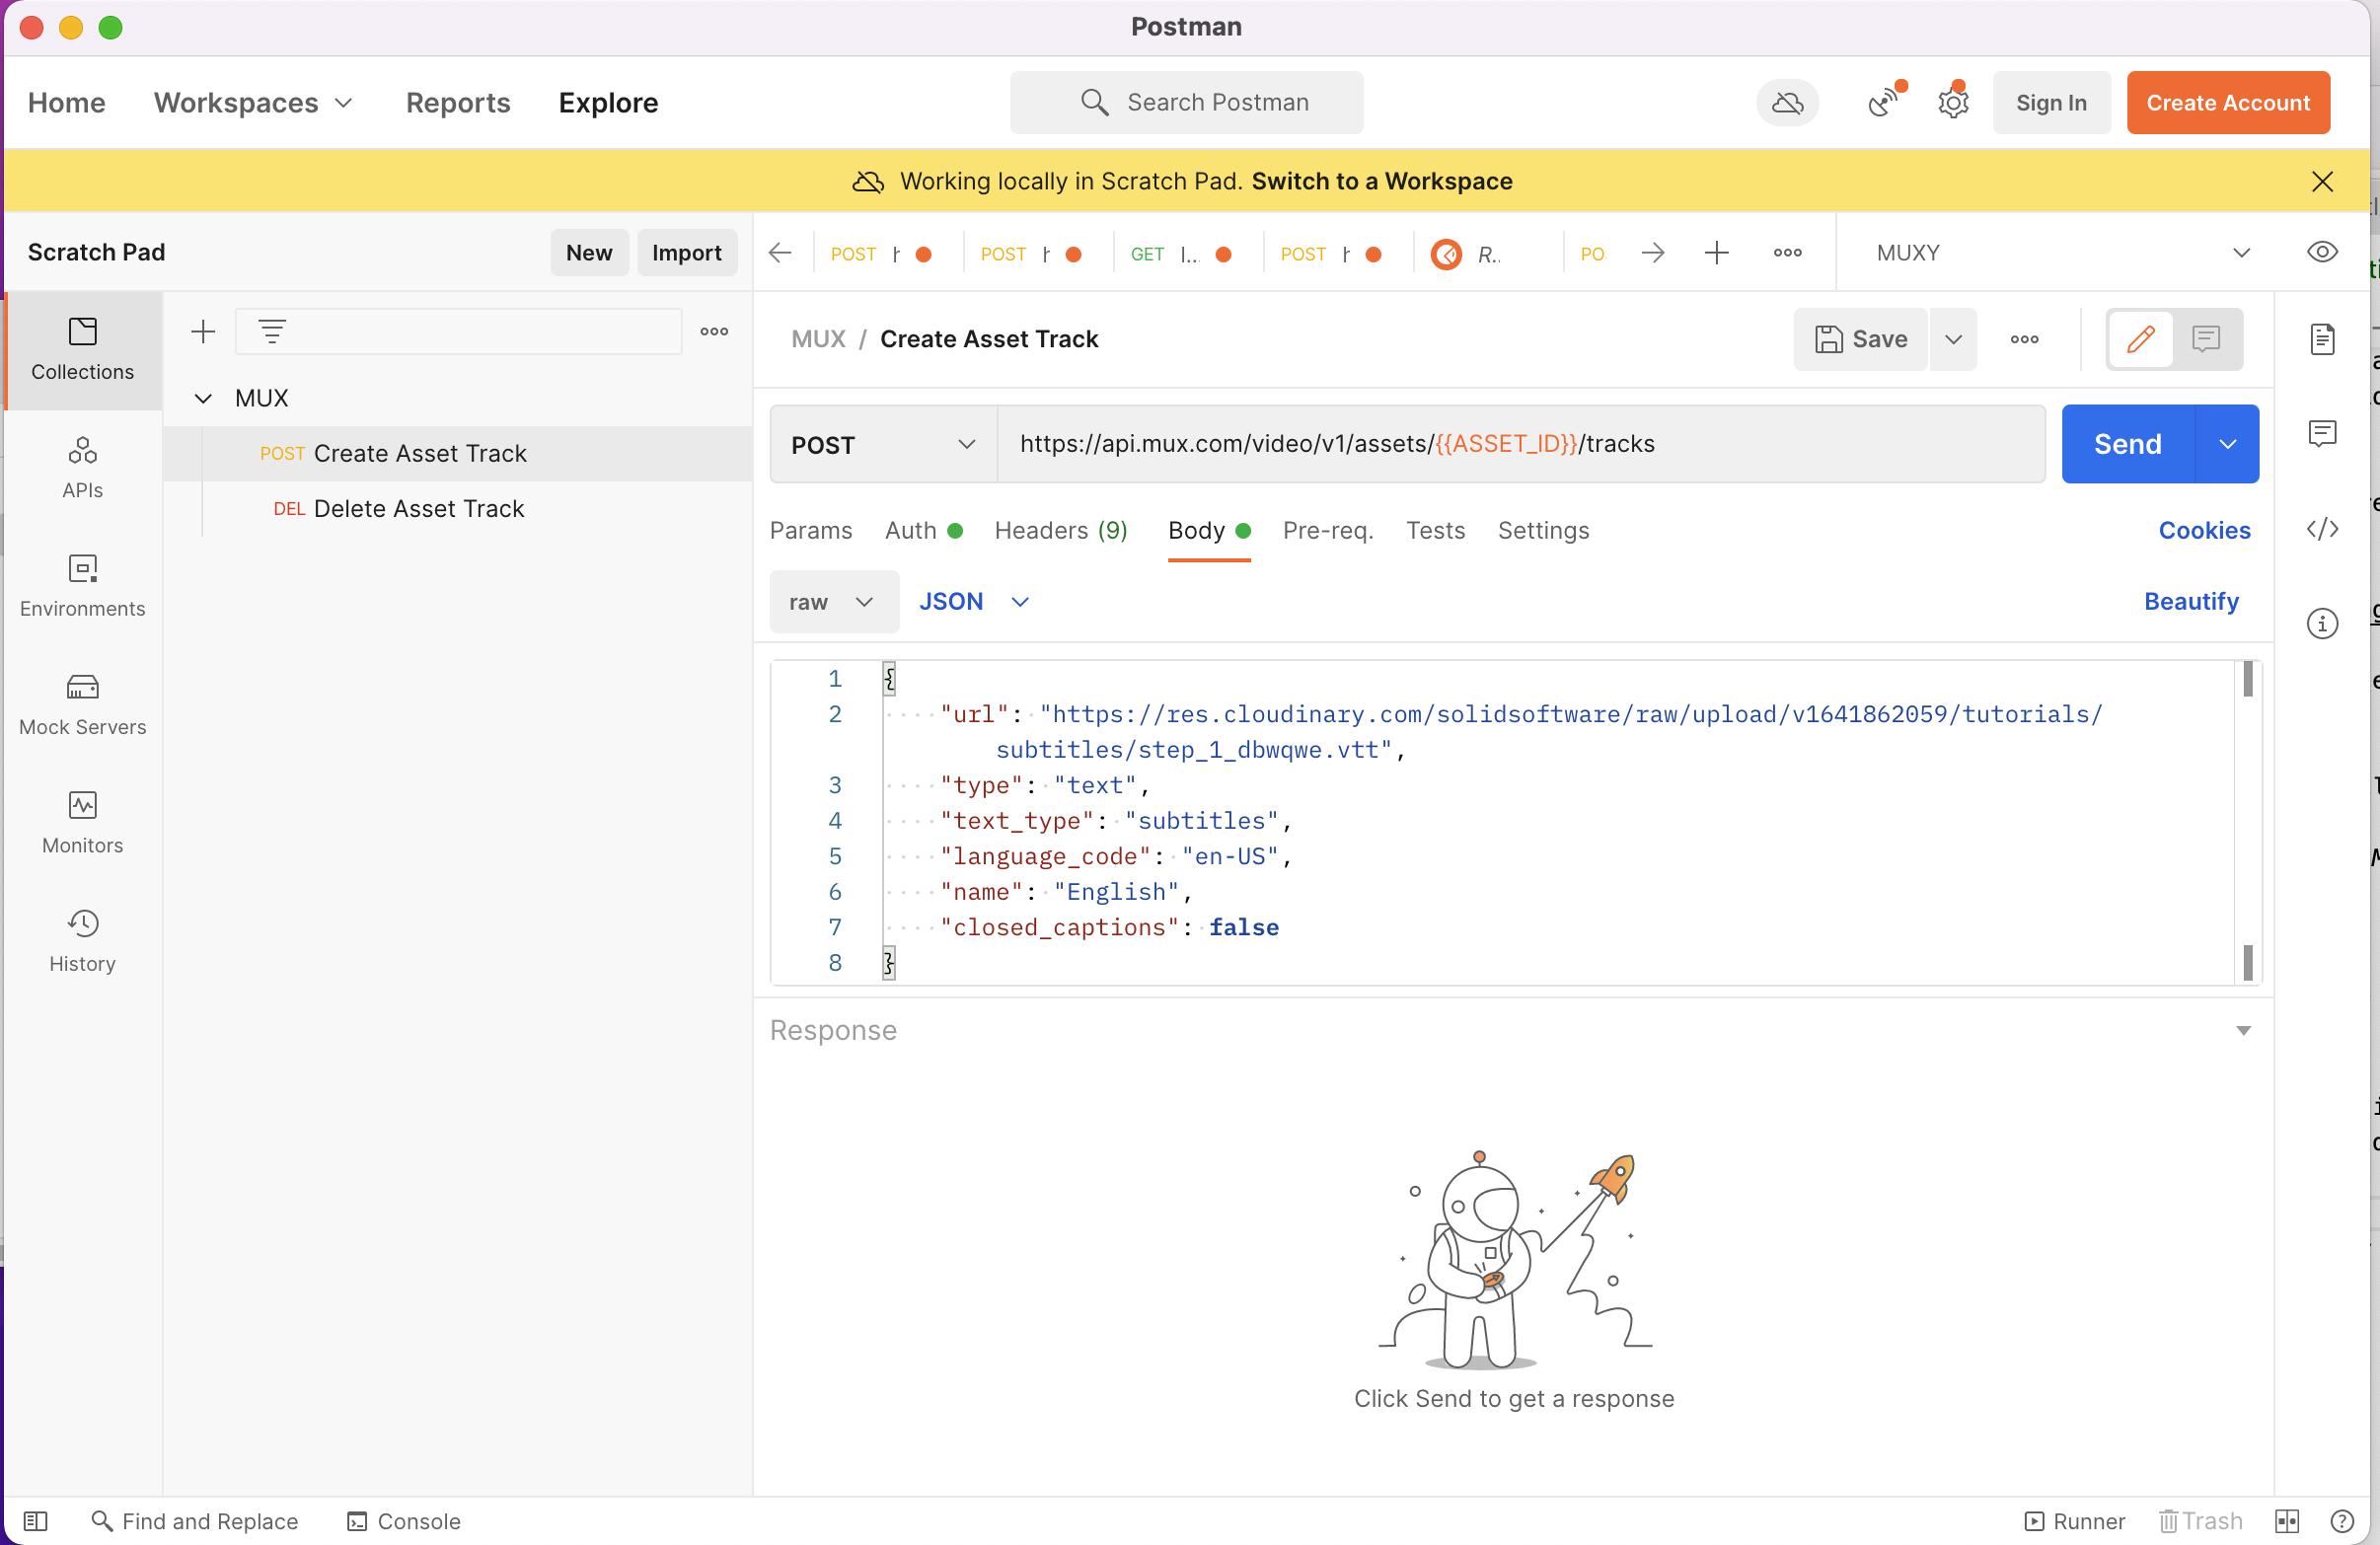
If the request succeeds you’ll be able to see the attached track in your video asset’s dashboard on Mux.com! 🥳 Now when you are streaming this video asset with it’s attached subtitle track the browser’s player will have the option to turn on subtitles. I wanted to have the subtitles show by default when viewing the video, so… on my server when I am generating my video’s playback URL I set the ‘autoselect’ parameter to YES e.g.
fmt.Sprintf("https://stream.mux.com/%s.m3u8?token=%s&default=YES&autoselect=YES", playbackId, *videoToken)
Using Subler to Attach Subtitles
When I want to distribute my videos outside of my site with subtitles… I use the open-source application Subler to embed my generated WebVTT subtitles directly into my video. Point Subler to your video file with the ‘+’ button, followed by your subtitles file (if you generated your subtitles with VideoSubs it’ll be the .vtt file).
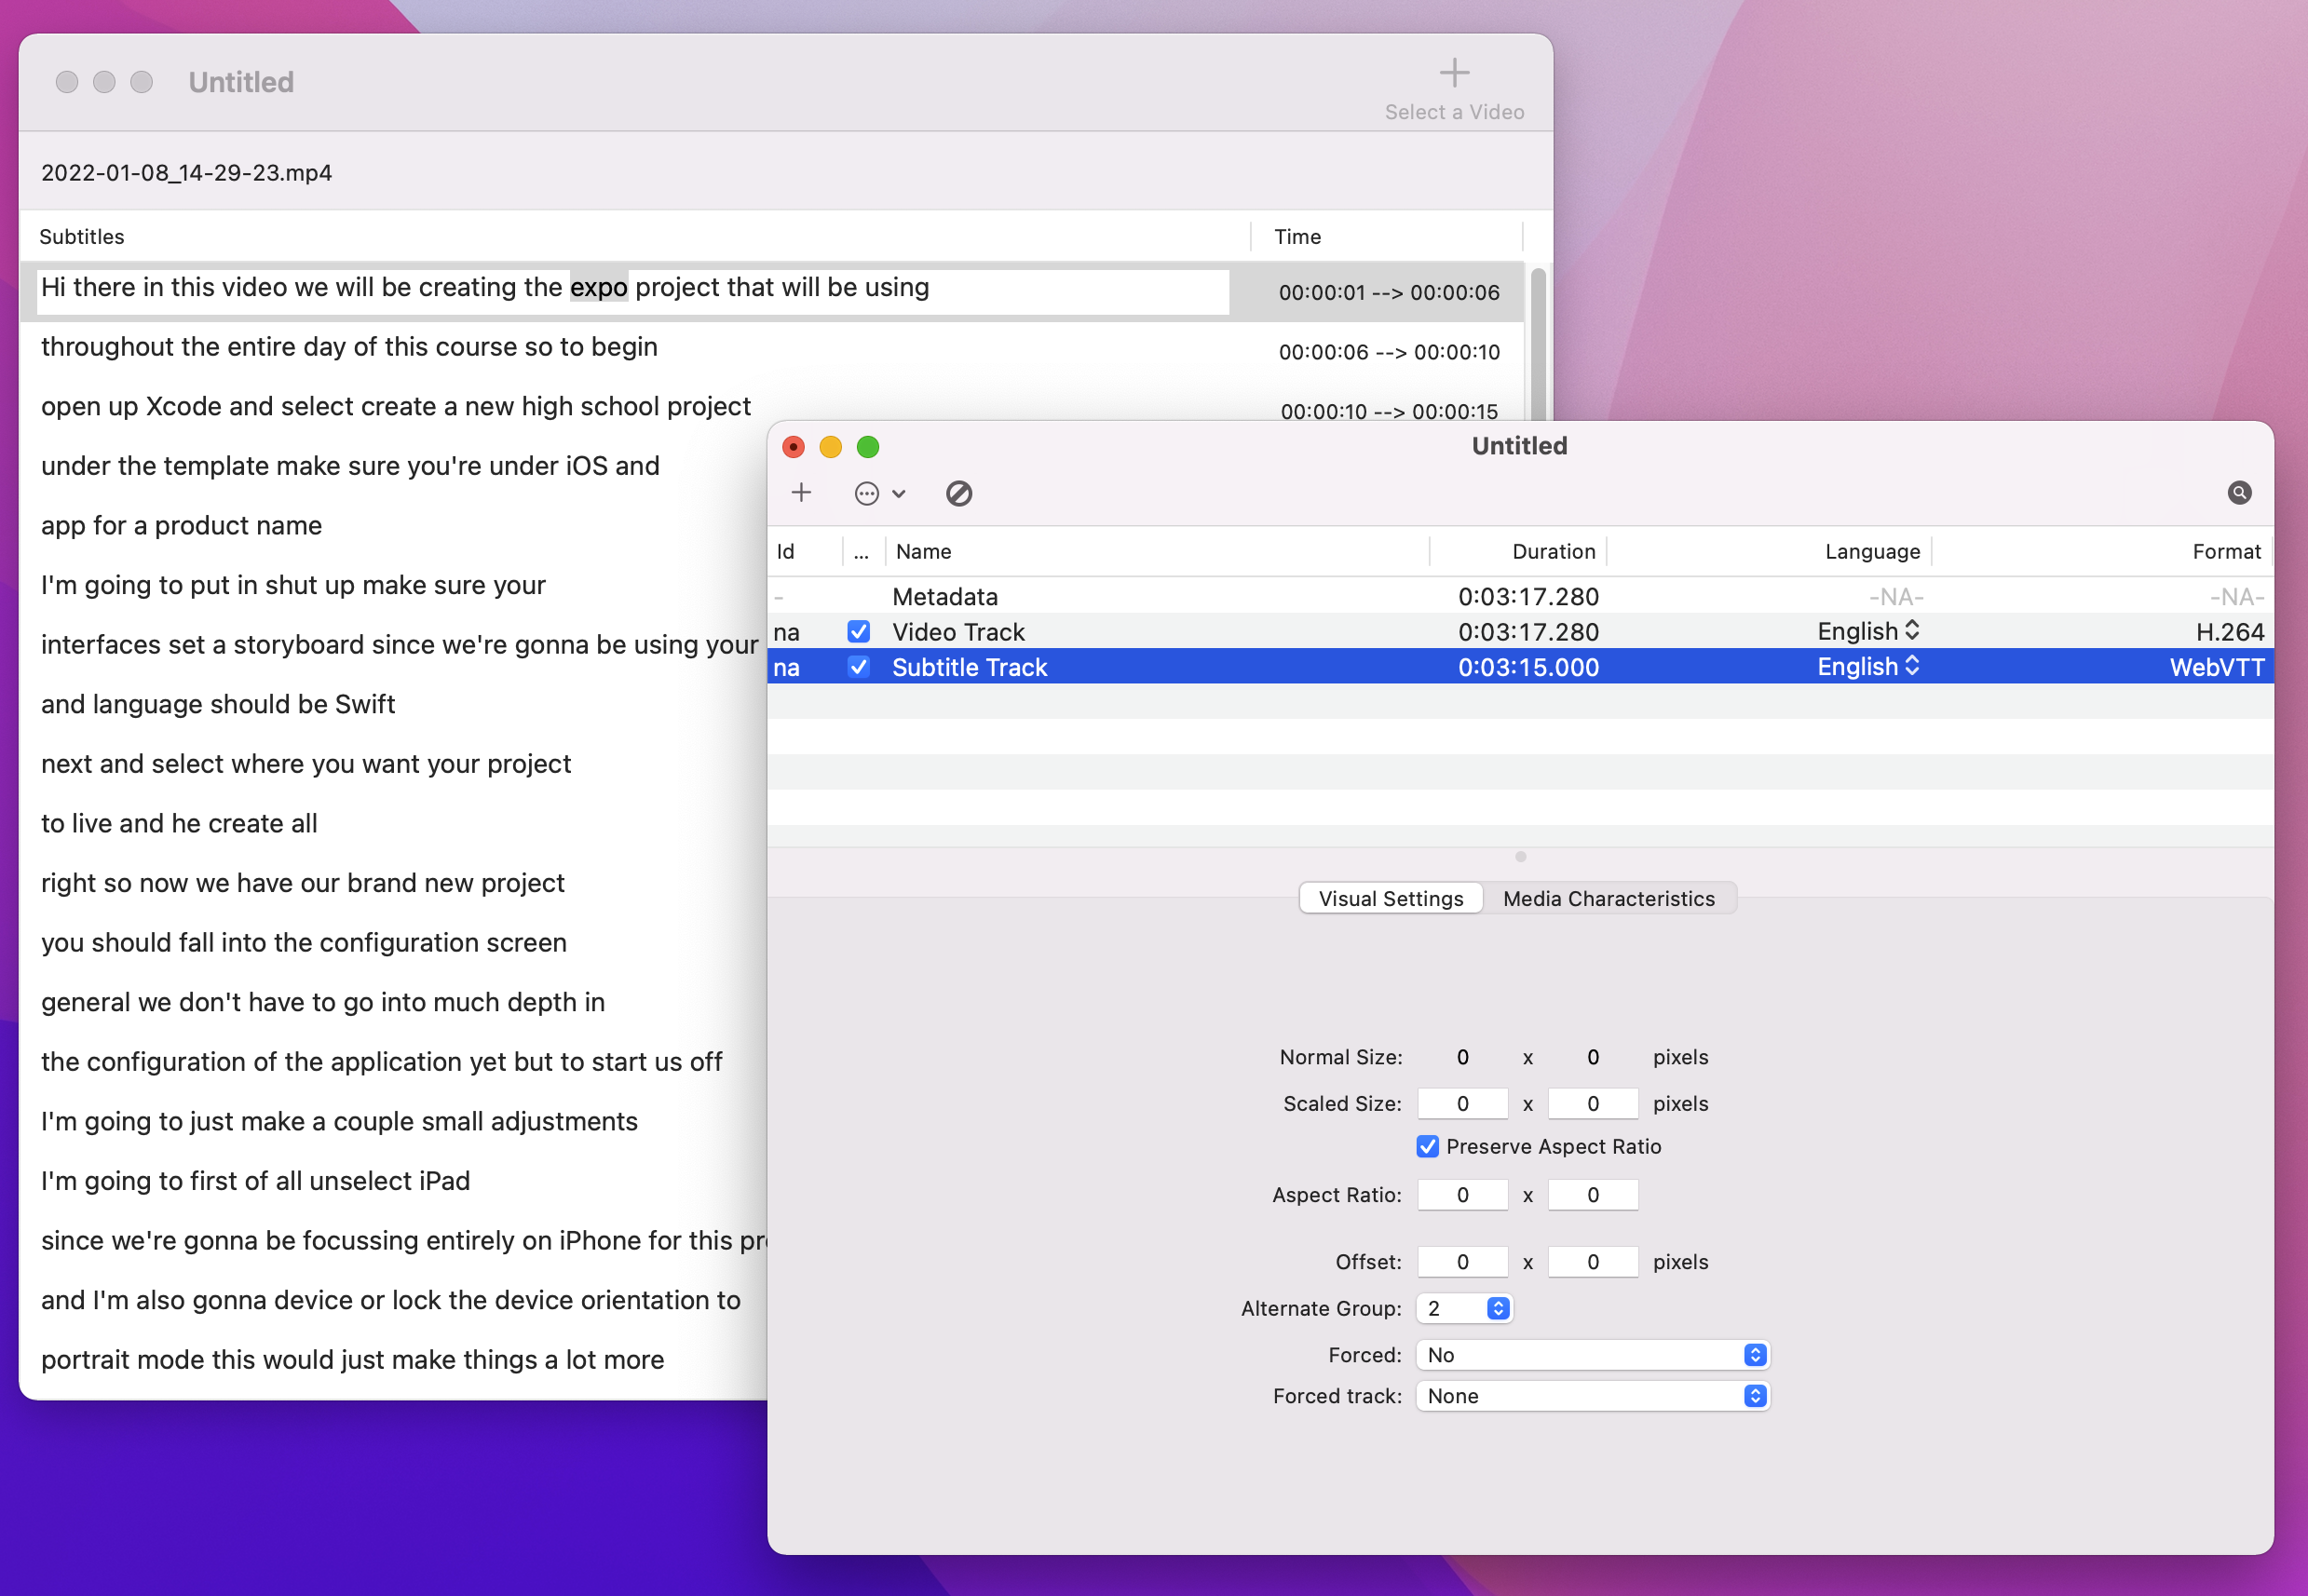
Once your track is added, click the “Send To Queue” option within Subler’s File menu. If Subler’s Queue window is not currently displaying tap on ‘Show Queue’ under the Window menu– once you tap on the play button within the Queue window your new video, now containing your subtitles track, will be exported to the location you specified.
To verify the subtitles were added correctly you can play your new .mp4 file in QuickTime Player. If everything worked you will be able to select your subtitles track in QuickTime’s subtitles dropdown as shown here:
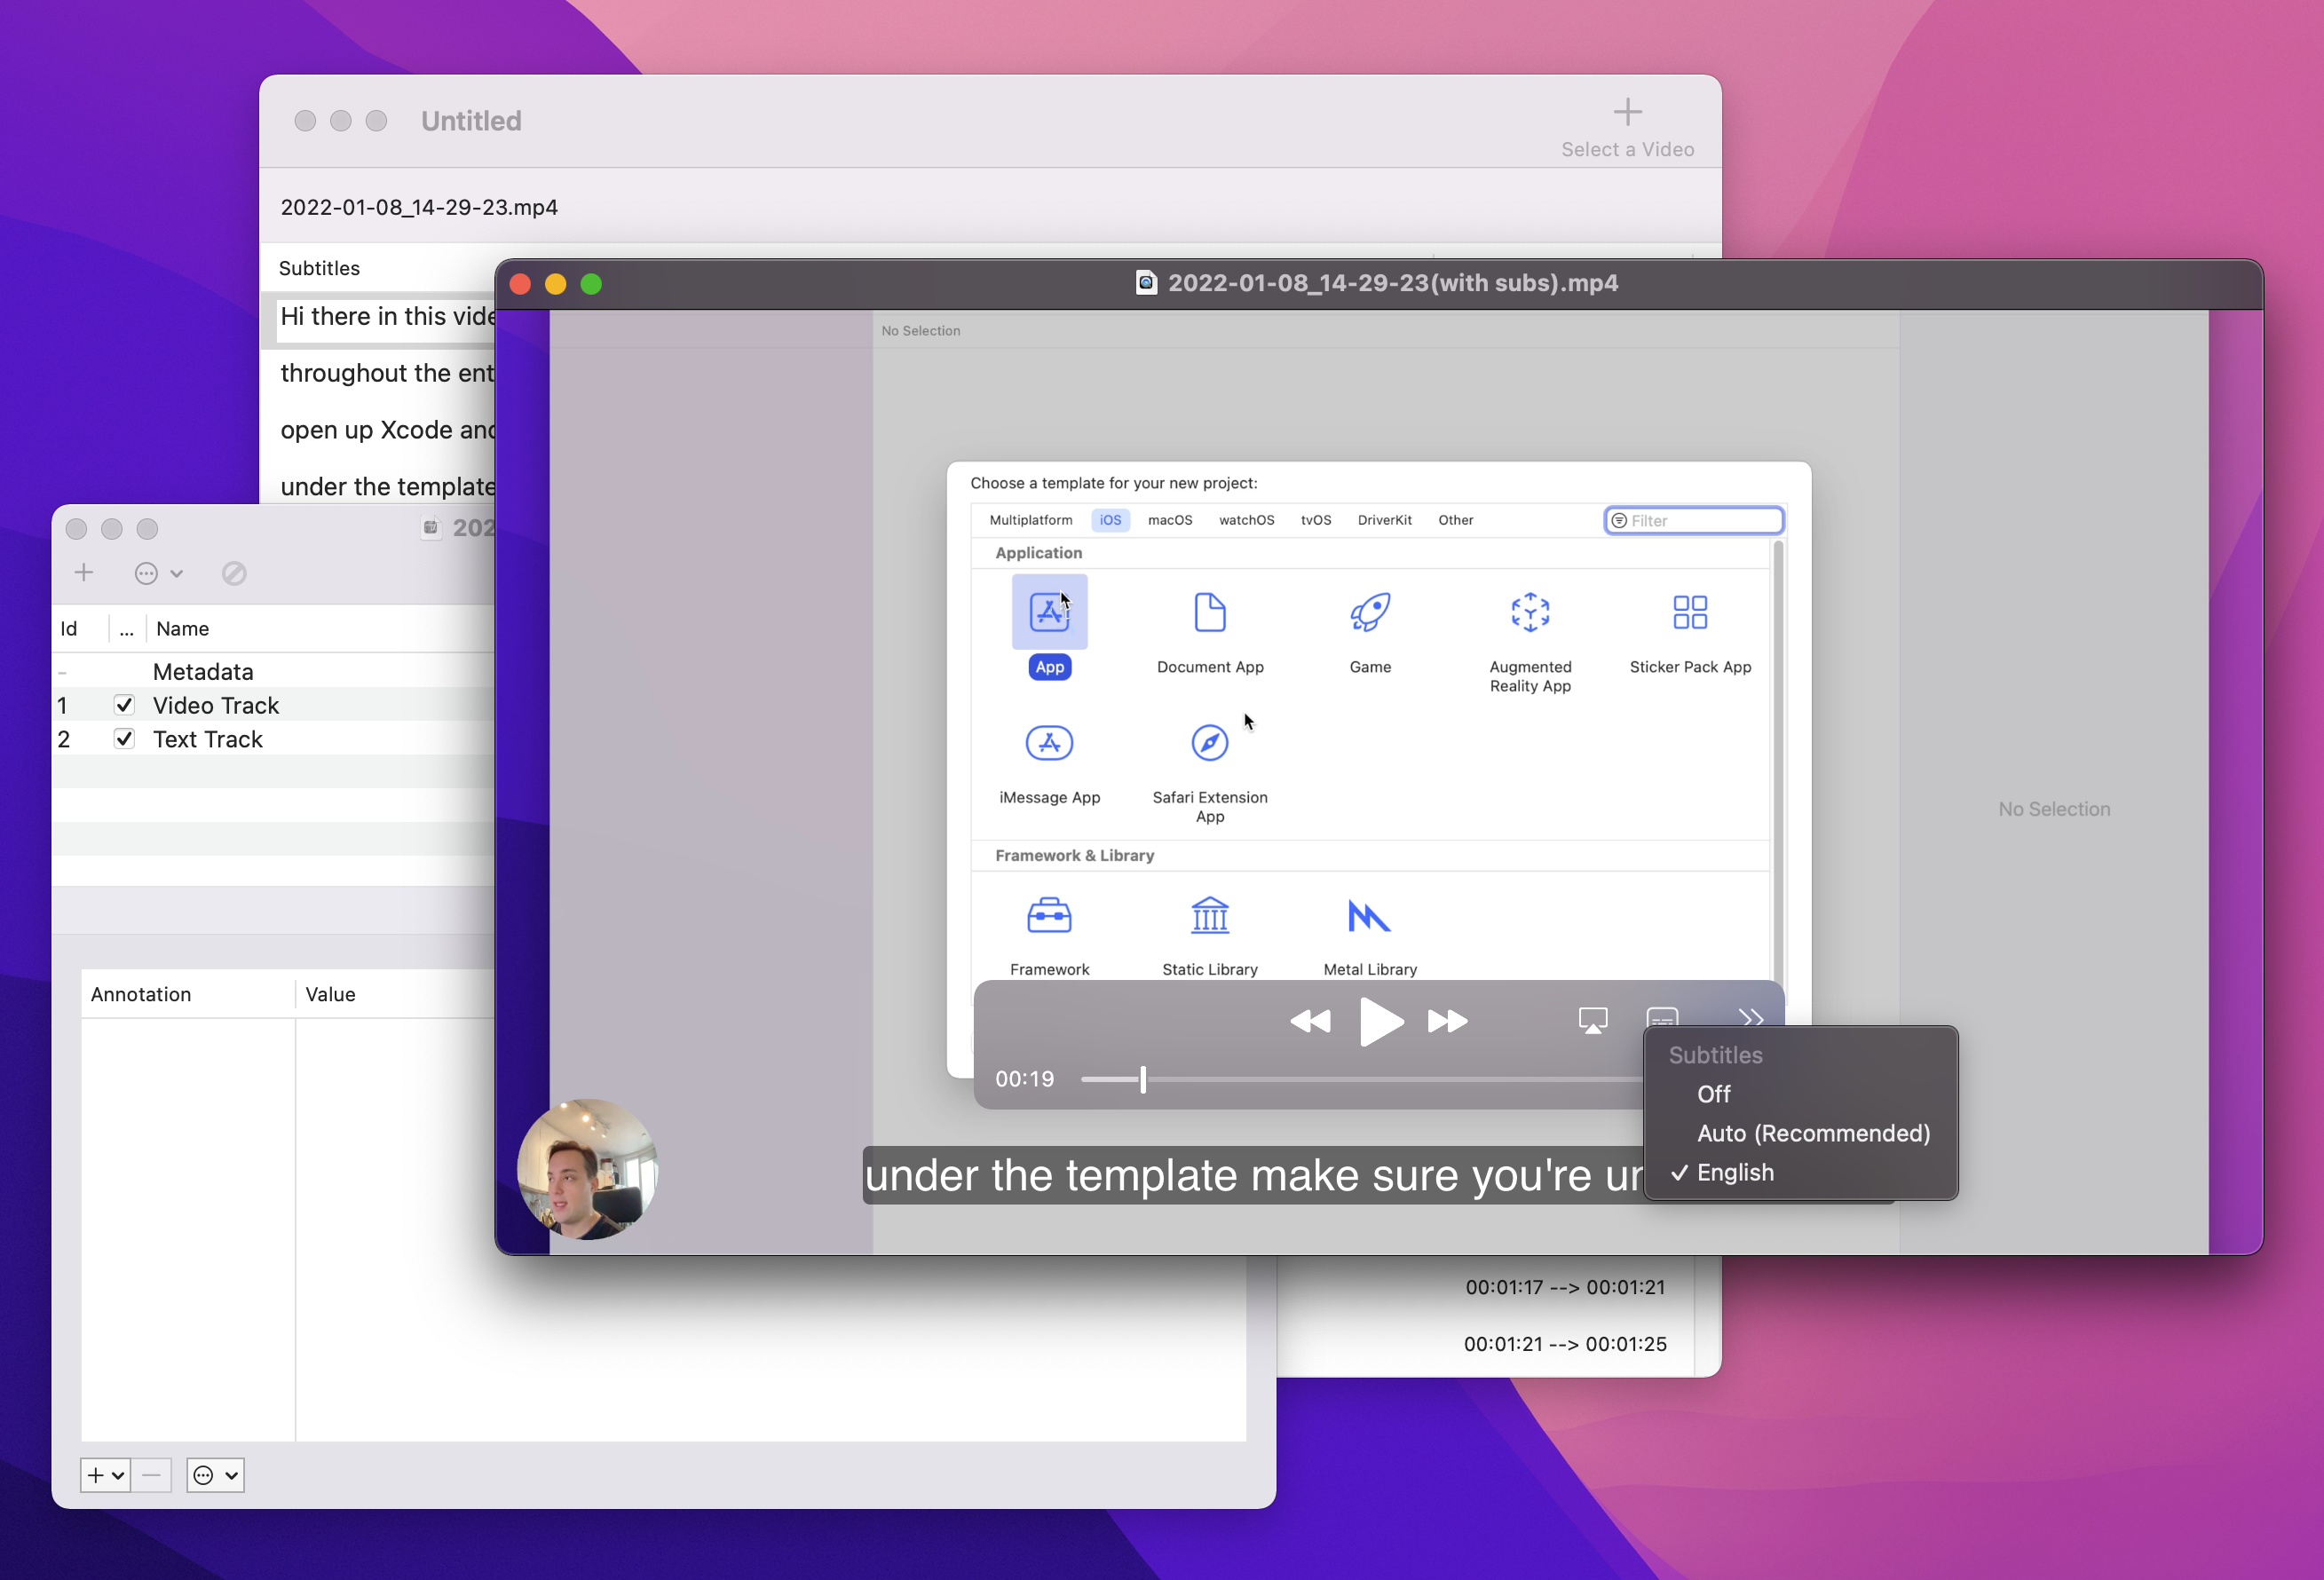
Voila!
Conclusion
In this article I went over most of my video workflow (no details given on using OBS… maybe in a future article?) which ended up with me shamelessly plugging the app I created for generating subtitles called VideoSubs!
If you are still here, thanks for reading ❤️ and if you have any questions regarding my workflow or would like to compare notes please send me an email.